
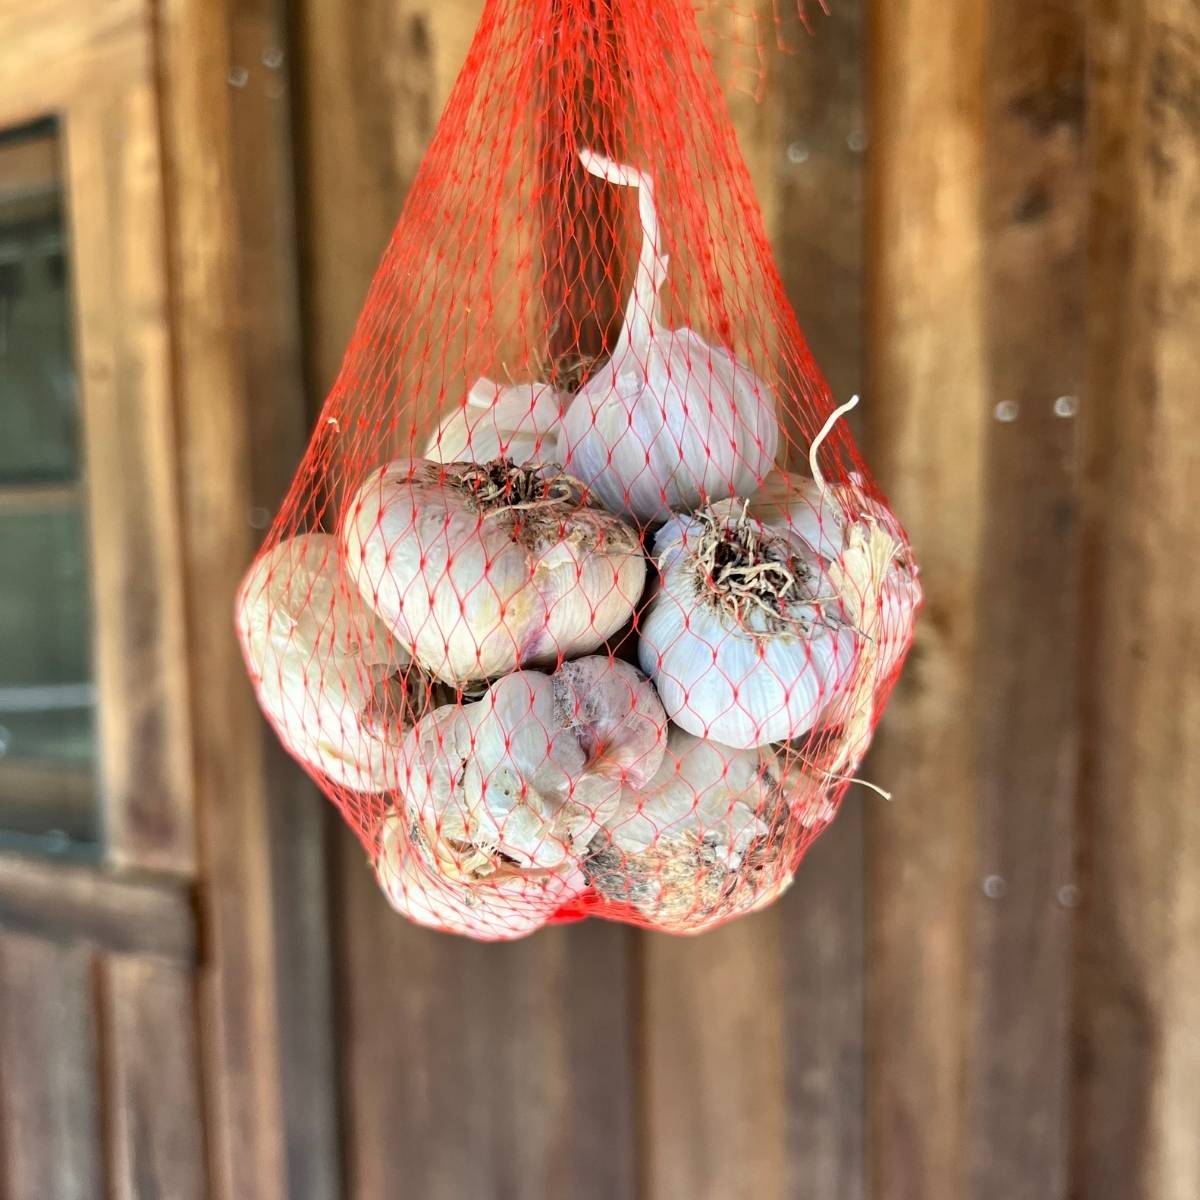
Knowing How and When to plant garlic in Kentucky is a homesteader’s treasure. It is the one fall job that provides you with a a fantastic gift the following summer that keeps on giving through most of the year. You tuck cloves into the ground in October – November, peak at them through the cold, and come July you’re pulling up fat, home-grown bulbs that taste nothing like the ones from the store.
Most guides will tell you to “mulch with straw” and leave it there. I want to show you what I actually do here in Kentucky clay — including a winter-protection trick that kept snow off my bed all winter and bugs out of it come spring. That single step is the difference between a decent garlic patch and a great one, and I’ve almost never seen anyone else mention it.

Here’s everything I have learned about how to grow garlic in Kentucky: when to plant, which variety to grow (what I have actually grown), how I get it in the ground, my cover method, harvest, and where to find seed garlic from actual Kentucky growers. I grow this here every year — the photos below are my own beds. For the hard planting dates, I’ll point you straight to UK Extension, because that’s their wheelhouse.
Quick Answer: When to Plant Garlic in Kentucky
Plant garlic in Kentucky in October through early November — in the fall, so the roots establish before the ground freezes hard.
UK Extension publishes safe planting windows by region:
| Region | Earliest | Latest |
|---|---|---|
| Eastern Kentucky | Oct. 1 | Nov. 1 |
| Central Kentucky | Oct. 1 | Nov. 7 |
| Western Kentucky | Oct. 1 | Nov. 15 |
Source: University of Kentucky Cooperative Extension, “Growing Your Own: Garlic” (NEP‑241).
The one-line reason: garlic planted in fall spends the winter growing roots, not leaves. Those established roots are what give you a big bulb the following summer.
Insight: See what else I plant in the Fall in Kentucky
First Things First — It’s Cloves, Not Seeds
This trips up a lot of new growers, so let’s clear it up before you buy anything: you don’t plant garlic seeds. You plant cloves.
Take a whole head (bulb) of garlic, break it apart into individual cloves, and each clove becomes one plant — and eventually one whole new bulb. That’s it. If you’re searching for “garlic seeds,” what you actually want is “seed garlic,” which just means good, healthy bulbs sold for planting.

Two things worth knowing:
- Buy seed garlic, not grocery-store garlic. Supermarket bulbs are often treated to stop them sprouting, and many are grown in warmer climates that never toughened them up for a Kentucky winter. Seed garlic is grown for planting, sold as named varieties, and far more likely to actually perform. Some say they have success with Organic from the store, it’s your choice, but I like to know what variety I am growing.
- Plant each clove pointy end up, flat end down. The pointy tip is where the green shoot comes out; the flat, scarred end is where the roots go. Get a clove upside down and it’ll still try, but it wastes energy correcting course.
Choosing a Variety for Kentucky
Garlic comes in two families: hardneck and softneck. Both grow in Kentucky, but for most Kentucky gardens, hardneck is the pick. Research out of Kentucky has found hardneck types survive our winters and yield better than softnecks, and they give you bigger, easier-to-peel cloves — plus scapes in spring, which are a bonus crop in their own right.
Hardnecks to look for:
- Music — probably the most popular hardneck for a reason: classic, full garlic flavor, large bulbs, and it stores well. UK Extension names it as a recommended variety, and it’s the one most Kentucky growers point new folks toward.
- Bogatyr — another UK-recommended hardneck; smaller bulbs with striking purple-striped skins and a hotter, stronger bite.
- Chesnok Red, German Red, Romanian Red — three more hardnecks Kentucky growers reach for regularly. Chesnok Red is a favorite for cooking and roasting; the “Red” porcelain and purple-stripe types handle cold beautifully.
A note on softnecks: softneck varieties (like Inchelium Red or Polish) tend to store longer — six months to a year — and are the ones you braid. No scapes. They do a little better in the milder western part of the state. If long storage or braiding is your goal, they’re worth a row.
For the complete month-by-month schedule, see our Kentucky Vegetable Planting Calendar.
What Garlic I actually Grow, and the One that Sold Me
The Extention says hardneck for Kentucky, and that’s the safe call. But I grow a mix, and I lean toward longer storage, so two of mine are softnecks: Italian Late and Red Toch, both good keepers that carry me deep into winter.
My third is Spanish Roja, a rocambole (sometimes called Greek garlic), and that one’s a story. The grower handed me a culinary sample to taste. I took it home and its so spicy and full of robust garlic flavor, I was smitten. Then, oh my, I browned it and stirred it into a batch of my homemade butter, and the flavor was out of this world. Sold forever. So my honest take: plant a hardneck for the flavor and the scapes, and tuck in a softneck or two if you want garlic a bit longer storage life.

Where to Get Seed Garlic
Order early — good seed garlic sells out through late summer and fall, and the best varieties go first.
My first choice: If you want garlic grown right here in Kentucky — naturally grown, already proven in our climate, and available without shipping bulbs across the country — I send people to Bobbett’s Naturally Grown in Liberty, KY.
(Full disclosure: I built their website and we became friends, so I’m not a neutral party — but I point you there because it’s a real naturally local grower, which is exactly what the big national seed sites can’t offer.) This is the honest answer to “garlic bulbs for planting near me” that a national catalog can’t give you: seed garlic that’s already spent its life in Kentucky ground.
Want Music specifically? It’s the one hardneck I named above that neither my go-to grower nor I plant (as of yet) — but there’s a Kentucky farm that grows nothing else. Organic Garlic Plus in Union, KY raises a single variety — porcelain hardneck Music — and sells it as seed stock in two clove sizes (large and jumbo). If Music is the one you want, you can get it grown right here in Kentucky instead of shipped in from out of state. (No affiliation — I just like that they’re local and do one thing well.)
Heads up: their site routes you through a separate shop to order, so give it a minute if it feels clunky.
Whichever you choose, one rule holds: buy seed garlic from a grower, not bulbs from the grocery store.
How I Plant Garlic in Kentucky
Soil prep — the clay reality. You might get lucky with sandy loam, but my whole property is heavy Kentucky clay, and for garlic that matters more than you’d think. Garlic wants loose, well-drained soil in full sun — and wet clay is exactly what it doesn’t want. Soggy soil stunts the bulbs, stains their wrappers, and over a Kentucky winter it’s what rots cloves before they ever sprout. I fight it two ways: raised beds (my metal raised beds for Kentucky →) for complete control over drainage and soil quality, and amending with compost — my first year in-ground I worked in my own compost and the garlic did great (though I wish I’d mulched heavier going into winter — lesson learned). Loose, crumbly, well-drained soil is what gives you a big bulb instead of a small, stained one.

How I beat the clay: a mounded bed, built up and worked full of my own compost so water drains away instead of sitting on the cloves all winter.

#2: a raised bed, worked in my own compost, organic fertilizer, with raised bed soil, so water drains away instead of sitting on the cloves.
Garlic Spacing and depth (UK’s numbers):
- Rows: 12 to 18 inches apart
- Cloves: 6 inches apart
- Depth: 1 to 2 inches deep
Source: UK Cooperative Extension, NEP‑241.
Orientation. Pointy end up, flat root end down — every clove. Firm the soil over the top.
Here’s my actual habit: I space exactly to UK’s numbers above — I don’t try to cram them tighter. What I do fuss over is the soil. I work in compost and fertilizer first and get the bed fluffy before a single clove goes in, because my clay turns to a gloppy goo if I work it wet — so I never plant into damp clay, and I don’t water beforehand. I plant into that loose, dry-ish, fluffy soil, then water it in once everything’s in the ground. That order matters with clay: wet-then-worked is how you end up with a dense, compacted bed instead of the crumbly one garlic wants.
My Winter Garlic Protection Method
This is the part the national guides don’t have, and it’s the part that made the biggest difference in my beds.
Everyone says “mulch with straw.” I do mulch — but I use leaves, and then I add a step almost nobody talks about: an insect cover over the whole bed.
Step 1 — Leaf mulch
After the cloves are in, I cover the bed with a thick layer of leaves. I did this one year because I could not find organic straw, and honestly, my property is surrounded by leaf giving trees! Perfect timing as fall arrives the leaves fall and give me free mulch! WIN! I do an extra step and put them in a metal barrel and put the weed eater, with string not the blade attachment, in there and give them a good chop.
It kept weeds down and my garlic is all snuggled in nicely the next year. They also add nutrients to the soil. Leaves insulate the cloves through Kentucky’s brutal freeze-thaw swings, which are what actually heave young garlic out of the ground.

The garlic bed, adding a thick blanket of leaves — free off my own property, and they break down into the soil by summer.
Step 2 — The insect cover
Over the mulched bed I run a length of fine garden insect netting — I use a 10′ x 30′ bug-barrier net (a fine-mesh netting I found on Amazon), the kind woven tight enough to keep out the small stuff. I drape it over 72″ metal hoops bent into low tunnels over the bed — I got mine from a local Amish greenhouse supplier (Martins), not a big-box store. To hold it all down against Kentucky wind, I anchor the edges with rocks, and lately I’ve switched to metal landscape staples, which are faster and grip better. It goes on right after planting and stays put through winter and into spring. Here’s what it does that plain mulch can’t:
- Winter: it kept the snow off the bed, so the mulch stayed put and the soil didn’t sit soaked and frozen.
- Wind: keeps the leaf mulch in place in our strong Kentucky winds.
- Spring: when the green tops pushed up, the cover kept the bugs off — no thrips chewing the new leaves, no maggots finding the young bulbs.

My garlic protection step — the garlic bed under a light cover on hoops. (this is a different bed I tried in my transplanting garlic post)
That’s 3 problems solved with one step: winter protection and early-spring pest protection. It’s a small amount of extra work in October that pays off twice. If you’ve ever lost garlic to a hard freeze-thaw or found your spring leaves speckled and twisted from thrips, this is the fix.
Looking for zone specific Printable Vegetable Calendar?
YES, all twelve months, In ONE printable calendar. Written by a Zone 7a homesteader growing food to feed the family & sharing as I learn.
Plus occasional real-talk homesteading tips. No woo-woo, just what works.
Through the Seasons — What to Expect
Garlic is a slow, patient crop. Here’s the rhythm so you’re not worrying that nothing’s happening:
- Fall: roots grow underground; you may see a little green push up before dormancy. That’s fine. I just added more leaf mulch.
- Winter: the plant sits dormant under mulch (and, for me, under the cover). Do nothing.
- Spring: green tops shoot up. Feed with compost or a slow-release fertilizer as the new leaves form. On hardnecks, you’ll get scapes — curling flower stalks — in late spring. Snap them off once they curl; it sends the plant’s energy down into the bulb instead of into seed. (Bonus: scapes are delicious — sauté them or blend them into a pesto.)
- Early-to-mid summer: the tops start to yellow and brown. Harvest time is coming.

Spring: Spanish Roja garlic green tops pushing right up through the leaf mulch — proof it came through winter, and that the leaves did their job.
When to Fertilize Garlic (and When to Stop)
Garlic is a hungry crop — it has a moderate-to-high appetite for nitrogen — but the timing matters. I work in compost and a bone meal fertilizer into the soil before planting, then I plant my bulbs. In the spring I add a nitrogen fertilizer, or something like a The moment green shoots push up through the mulch in early spring, then again a couple of weeks later. UK Extension’s Kentucky rule of thumb is to side-dress every two weeks through spring until the bulbs start to form; a nitrogen source like blood meal, or a balanced fertilizer at the label rate, does the job.
Here’s the one rule worth circling: stop feeding nitrogen by early May. Once the plant shifts into making a bulb, extra nitrogen just pushes leafy top growth instead — the opposite of what you want. And if you worked plenty of compost into the bed back in fall (like I do to fight the clay), you may barely need to feed at all come spring.
While we’re on spring care — water, too: garlic wants about an inch a week, then ease off as harvest nears. Stop watering roughly two weeks before you dig, because soggy soil late in the season stains the bulb wrappers and invites rot.
Don’t Skip the Scapes
In late spring, hardneck garlic sends up a curling flower stalk called a scape. Snap these off once they curl — it sends the plant’s energy back down into the bulb, and you’ll get a noticeably bigger head for it. But don’t toss them: scapes are one of the best bonus crops in the whole garden. They taste like mild, green garlic, and they make a fantastic pesto or a quick sauté in butter. It’s basically a free harvest weeks before the bulbs are ready — and it’s a perk softneck growers don’t get, which is one more reason I plant hardneck.

A hardneck scape. You can chop these and use in pesto or as a spring onion — a free harvest before the garlic’s even ready.
Harvest

The payoff: garlic, fresh out of the ground and ready to cure.
Knowing it’s ready. In Kentucky, bulbs mature from late June into mid-July. Don’t wait for the whole plant to die back. You want to harvest when several of the lower leaves have gone brown but there are still five or so green leaves up top — those green leaves are the wrapper layers protecting the bulb, and UK Extension notes three-to-five healthy wrapper leaves as the sign of a well-formed bulb. Let too much of the plant brown off and the bulbs split and won’t store.
How I dig them. Don’t yank — you’ll snap the stalk off the bulb. Loosen the soil first with a fork, then lift each bulb gently by hand. Same rule as planting: I dig when the soil’s on the dry side, never after a soaking rain. Wet clay clings to the bulbs and clumps up hard, and you’re far more likely to bruise or nick a bulb prying it out of heavy, soggy ground — and a nicked bulb won’t cure or store well.
Curing. Get them out of the sun immediately — direct sunlight will scald a freshly dug bulb. Move them somewhere shaded, dry, and breezy, and let them cure for about two weeks (longer in humid weather; a fan helps). Once the skins are papery and the necks have dried down, trim the roots and tops, and store the bulbs in a mesh bag or slatted crate somewhere cool and dark. Well-cured garlic keeps for months — and don’t forget to set your best bulbs aside to replant this fall.

Cured and trimmed, ready to store — the finished result you’ve been growing toward since October.
Wrapping Up
That’s the whole cycle: get your cloves in the ground in October, pick a hardneck that suits Kentucky, mulch with leaves, throw a cover over the bed to beat the freeze-thaw and the spring bugs, and then be patient until summer. It’s genuinely one of the lowest-effort, highest-reward things you can grow here — a few hours in fall for a whole summer’s worth of garlic.
If you plant some this year, I’d love to know how it goes.
Kentucky Garlic Questions (by Region)
These are the questions I see Kentucky gardeners ask over and over in local groups — the ones that never get a clear answer in a comment thread. Here’s my straight take.
What kind of garlic should I plant in Louisville, KY?
Hardneck, same as most of the state. Louisville sits in central Kentucky, so your planting window runs roughly October 1 to November 7 (per UK Extension). Music is the easiest one to start with — reliable, big cloves, good storage. The thing that trips up Louisville-area gardens more than variety is drainage: a lot of that ground is heavy clay, so plant into a raised bed or a mounded row so your cloves aren’t sitting in wet soil all winter.
What garlic grows best in Northern Kentucky?
Northern Kentucky runs colder — much of it is Zone 6b — and for garlic that’s good news, not bad. Hardneck varieties actually need a real cold period to form good bulbs, so the northern end of the state is ideal hardneck country. Plant toward the earlier side of the fall window so roots establish before a hard freeze, and lean on mulch (and a cover, if you can) to buffer the freeze-thaw swings that heave young cloves out of the ground. Music, German Red, and Chesnok Red all take the cold well.
Can you grow garlic in Zone 6b?
Yes — 6b is close to perfect for it. Garlic needs a stretch of winter cold to trigger bulbing, which is the whole reason you plant in fall. A 6b winter delivers exactly that. Get your cloves in the ground in October, mulch them in, and let the cold do its job. If anything, the colder Kentucky zones grow better hardneck garlic than the milder western end of the state.
Is it too late to plant garlic? Can I plant it in spring in Kentucky?
Garlic really wants to go in the ground in fall — October into early November — so it can root before winter and bulb the next summer. You can tuck leftover cloves in during early spring, but without that cold period they tend to make small bulbs, or none at all. So I treat spring-planted garlic as a crop for green garlic and scapes rather than big storage bulbs. If you’ve missed the fall window, my honest advice is usually to wait and plant at the right time this fall — you’ll be much happier with the harvest.
Where can I buy seed garlic near me in Kentucky?
Order early — good seed garlic sells out through late summer and fall, and the best varieties go first. For Kentucky-grown, naturally grown seed garlic, I point people to Bobbett’s Naturally Grown in Liberty, KY. (Disclosure: I built their website, so I’m not neutral — but they’re a real local grower, which is exactly what “garlic bulbs for planting near me” is asking for and what a national catalog can’t be.)
Can I just plant garlic from the grocery store?
You can, but I wouldn’t count on it. Supermarket garlic is often a softneck grown for a warmer climate, and some of it is treated to keep it from sprouting on the shelf — so results in Kentucky ground are hit or miss. Seed garlic is grown for planting, sold as named varieties suited to our winters, and far more likely to give you a real bulb.
A few related posts if you want to keep going:
- I even moved some garlic in spring once, against all the advice — here’s how that transplant experiment actually went →
- [coming soon] Harvesting, curing, and storing your garlic (coming soon)
- [coming soon] Cooking and preserving your garlic harvest
Hard planting dates, spacing, and harvest indicators cited from University of Kentucky Cooperative Extension publications NEP‑241 (“Growing Your Own: Garlic,” 2024) and CCD‑CP‑141 (“Garlic and Elephant Garlic,” 2024). The method, the mistakes, and the photos are my own.


Leave a Reply